
Making Your First Hand-Turned Wooden or Acrylic Pen
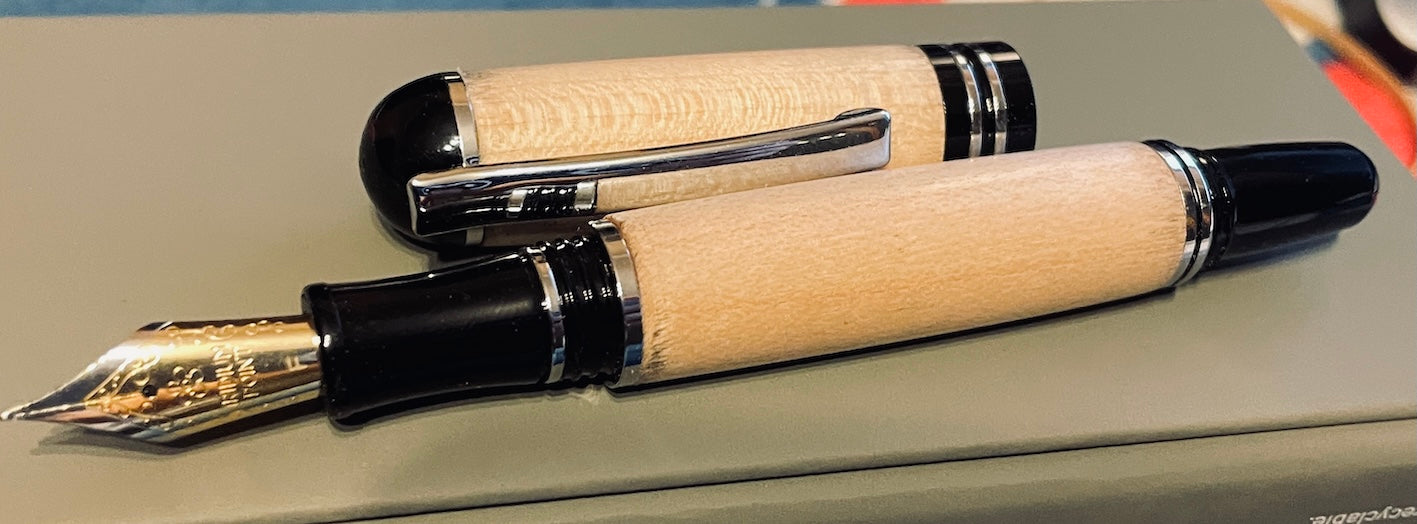
Making Your First Hand-Turned Wooden or Acrylic Pen
Making Your First Hand-Turned Wooden or Acrylic Pen
There is something deeply satisfying about creating an object that people use every day. Unlike many woodworking projects that end up on a shelf or hanging on a wall, a handcrafted pen becomes part of someone's daily routine. Every signature, note, sketch, or journal entry becomes a reminder that a simple piece of timber or acrylic was transformed by hand into a functional work of art.
For many woodturners, pen making is the gateway into the world of lathe work. The projects are small, affordable, and achievable in a single afternoon, yet they teach many of the fundamental skills used throughout woodturning. Whether you're working with a stunning piece of figured timber or a vibrant acrylic blank, making your first pen is an enjoyable and rewarding experience.
Why Pen Turning is Perfect for Beginners
Pen turning offers a relatively low barrier to entry. Pen blanks are inexpensive, the tools required are minimal, and mistakes are rarely costly. More importantly, each pen provides an opportunity to practice key turning techniques such as spindle turning, tool control, sanding, and finishing.
The compact size of a pen also means you can experiment with different materials and designs without investing heavily in large pieces of timber. Exotic hardwoods, burl timbers, stabilised woods, and colourful acrylics all become accessible options.
What You'll Need
Before you begin, gather the following essentials:
-
Lathe
-
Barrel trimmer or pen mill
-
CA glue or epoxy
-
Sandpaper ranging from coarse to fine grits
-
Pen press or bench vice
-
Finishing supplies
Most starter pen kits include all the metal hardware required, leaving you to provide the blank and tooling.
Step 1: Prepare the Blank
Begin by cutting your pen blank to the appropriate length. Most pen kits use two separate blank sections, corresponding to the upper and lower barrels of the pen.
Mark the grain direction if using timber. This simple step helps ensure the finished pen has a continuous grain pattern when assembled.
Drill a centred hole through each blank using the drill bit specified by your pen kit manufacturer. Accuracy here is important, as an off-centre hole can lead to uneven wall thickness during turning.
Once drilled, glue the brass tubes into the blanks using CA glue or epoxy. Ensure the tubes are fully seated and allow adequate curing time before proceeding.
Step 2: Square the Ends
After the adhesive has cured, the ends of the blank must be trimmed perfectly square to the brass tube.
A barrel trimmer, pen mill, or disc sander can be used for this task. Squaring the ends ensures the pen components fit together cleanly during final assembly and helps avoid unsightly gaps.
Take your time during this stage. Many assembly issues can be traced back to poorly prepared blank ends.
Step 3: Mount the Blank on the Lathe
Install the bushings and blanks onto your mandrel according to the instructions provided with your pen kit.
The bushings act as guides, defining the finished diameter of the pen and ensuring the turned blank aligns with the hardware components.
Once mounted, tighten the mandrel securely while avoiding excessive pressure that could cause flexing.
Step 4: Turning the Pen
This is where the transformation begins.
Start by roughing the blank into a cylinder using a spindle roughing gouge or carbide turning tool. Once round, begin shaping the profile of the pen.
Many beginners prefer a simple straight profile for their first project, while others choose a gentle curve that fits comfortably in the hand.
Work gradually and frequently compare the blank diameter to the bushings. The goal is to create a smooth transition between the finished blank and the pen hardware.
For acrylic blanks, use sharp tools and lighter cuts to reduce chipping. Acrylics often reveal spectacular colours and depth but require a little more patience than timber.
Step 5: Sanding for a Professional Finish
The difference between an average pen and an exceptional one is often found in the sanding process.
Begin with a coarse grit if necessary and work progressively through finer grits. Remove all scratches from the previous grit before moving on.
For wooden pens, sanding to 600 grit is typically sufficient before applying a finish.
For acrylic pens, continue through micro-mesh or polishing pads to achieve a glass-like shine. Properly polished acrylic can rival the appearance of professionally manufactured pens.
Step 6: Apply the Finish
The finish protects the pen and enhances the natural beauty of the material.
Wooden pens can be finished with friction polish, CA finishes, hard wax oils, or specialised pen finishes. Each option offers a different balance of durability, appearance, and application ease.
Acrylic pens generally require polishing rather than a protective finish, as the material itself provides durability and shine.
Take care not to rush this stage. A quality finish can elevate even a simple piece of timber into something truly special.
For a premium result on wooden pens, Vinnie's Oil range offers penetrating hard wax oils specifically suited to woodturning projects. Browse the Wood Finish range ->
Step 7: Assemble the Pen
Once finishing is complete, carefully press the components together using a pen press or bench vice.
Follow the kit instructions closely and check alignment as you go. The assembly process is straightforward but difficult to reverse if components are installed incorrectly.
As the final piece clicks into place, you'll experience one of the most rewarding moments in the craft—the transition from turned components to a fully functional writing instrument.
Common Beginner Mistakes
Nearly every pen turner encounters a few setbacks during their first projects. The most common include:
-
Drilling off-centre holes
-
Failing to square the blank ends properly
-
Turning below the bushing diameter
-
Rushing the sanding process
-
Applying too much pressure during assembly
The good news is that pen blanks are inexpensive, and every mistake teaches valuable lessons for the next project.
The Start of a Rewarding Hobby
Few woodworking projects offer the same combination of creativity, practicality, and instant gratification as pen turning. In just a few hours, a simple blank of timber or acrylic can become a personalised writing instrument that will be used for years.
Your first pen may not be perfect, but it will teach you skills that carry into every future turning project. More importantly, it marks the beginning of a craft that combines precision, artistry, and the satisfaction of making something truly useful by hand.
Whether you choose the natural warmth of timber or the vibrant colours of acrylic, your first hand-turned pen is unlikely to be your last.
More from the Journal

The Dust You Can't Afford to Breathe
Wood dust is classed as carcinogenic by the IARC, yet many workshops still treat it as a nuisance...
Read article → acrylic
Making Your First Hand-Turned Wooden or Acrylic Pen
A hand-turned pen is one of the most rewarding projects for new woodturners, combining creativity...
Read article →
Hard Wax Oils in Woodworking: A Modern Finish with Traditional Roots
Hard wax oils have become one of the most popular finishes in modern woodworking, offering a uniq...
Read article → acrylic blanks
Timber vs Acrylic Pen Blanks: How to Choose the Right Material for Your Next Pen
Timber or acrylic? Both make stunning pens — but they turn, finish, and look very differently. He...
Read article →